Difference between revisions of "ArmbianHowTo"
m (→Selecting video output) |
m (→Console login) |
||
| Line 4: | Line 4: | ||
== Console login == | == Console login == | ||
| − | |||
| − | + | Default login is: | |
| + | login: root | ||
| + | password: 1234 | ||
| − | + | After login you'll be prompt for new password. | |
| − | |||
| − | |||
| − | |||
| − | |||
| − | |||
| − | |||
| − | |||
| − | |||
| − | |||
| − | |||
== Selecting video output == | == Selecting video output == | ||
Revision as of 01:45, 9 November 2018
Contents
How to use Armbian images
The great Armbian documentation is available here: https://docs.armbian.com
Console login
Default login is:
   login: root
   password: 1234
After login you'll be prompt for new password.
Selecting video output
On most boards you can select between HDMI and LCD output
- A20-OLinuXino
- HDMI
- LCD
- A33-OLinuXino
- LCD
HDMI output if always with highest priority. That means you you plug HDMI cable, the output always will be on the monitor, regardless of other settings.
If HDMI is not present, then LCD output will be used. By default the image tries to use auto-detect method for the LCD. This will only work on newer panels and boards. You can manually override this in the u-boot console as follows.
- Stop in the u-boot
   Autoboot in 1 seconds, press <Space> to stop
   =>
- List all supported LCD panels:
   olinuxino monitor list

   Supported video outputs:
   ----------------------------------------
   LCD-OLinuXino                  - Video outout to the LCD connector with AUTO detect function
   LCD-OLinuXino-4.3TS            - Video output to LCD-OLinuXino-4.3TS
   LCD-OLinuXino-7                - Video output to LCD-OLinuXino-7
   LCD-OLinuXino-5                - Video output to LCD-OLinuXino-5
   LCD-OLinuXino-10               - Video output to LCD-OLinuXino-10
- Set configuration, for example LCD-OLinuXino-7
olinuxino monitor set LCD-OLinuXino-7
- You can make changes permanent with:
saveenv
- Reboot the board and you're ready:
reset
Building u-boot
Get the latest sources:
 git clone https://github.com/OLIMEX/u-boot.git
 cd u-boot
Build it:
 make A20-OLinuXino_defconfig
 make CROSS_COMPILE=arm-linux-gnueabihf-
Updating via USB
You can write the new u-boot to MMC, eMMC, SPI Flash or NAND (not fully supported) using DFU protocol.
Boot the board and stop at u-boot console.
Building image
Make sure to take a look at the official Armbian documentation here: https://docs.armbian.com
- Clone repository
 # git clone https://github.com/armbian/build.git
 Cloning into 'build'...
 remote: Counting objects: 32391, done.
 remote: Compressing objects: 100% (69/69), done.
 remote: Total 32391 (delta 60), reused 75 (delta 44), pack-reused 32278
 Receiving objects: 100% (32391/32391), 258.91 MiB | 959.00 KiB/s, done.
 Resolving deltas: 100% (21325/21325), done.
 Checking connectivity... done.
 Checking out files: 100% (2205/2205), done.
Soon (probably) there will be olimex fork with some customizations.
- Run builder
 # cd build
 # ./compile
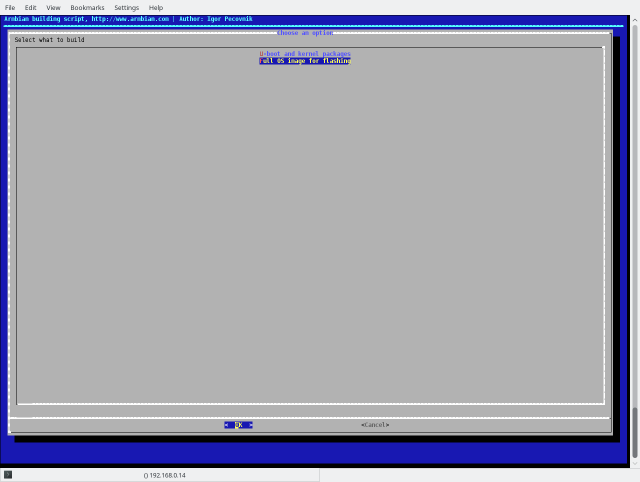
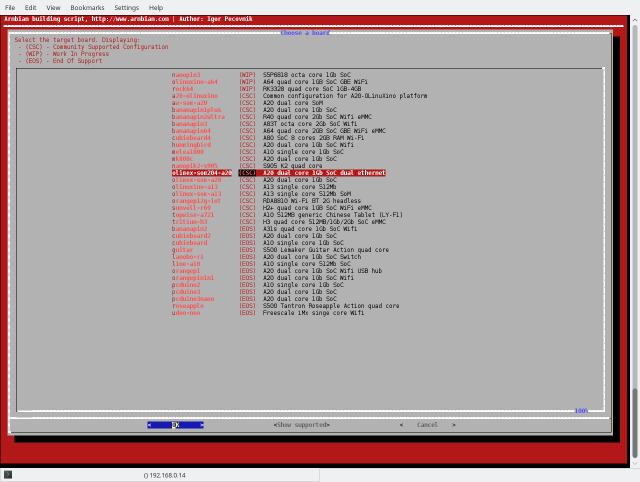
Building requires root access. System preparation can take long, depending on system, etc. After that you should see something like that:
Select Full OS Image for flashing. This will create output image for direct flashing on SD-card.
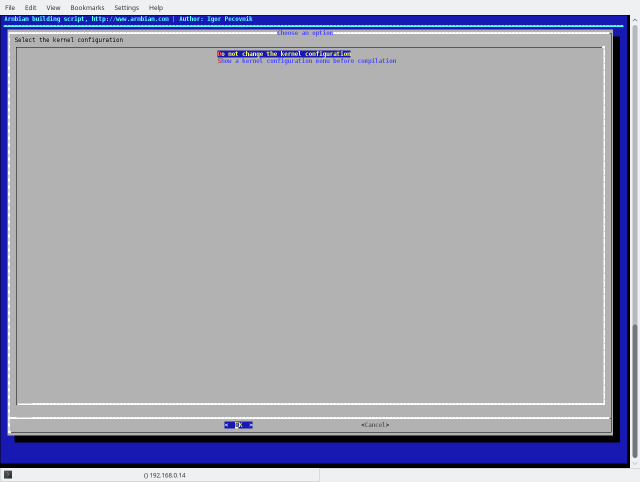
Select Do not change the kernel configuration. All needed configuration should be selected automatically. If you want some kernel modifications, select the other option.
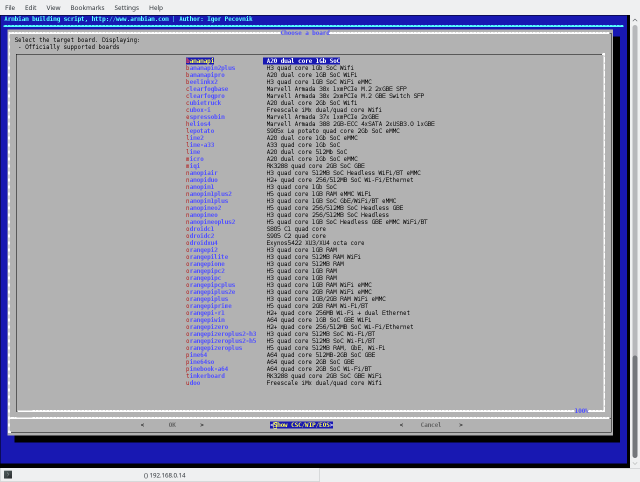
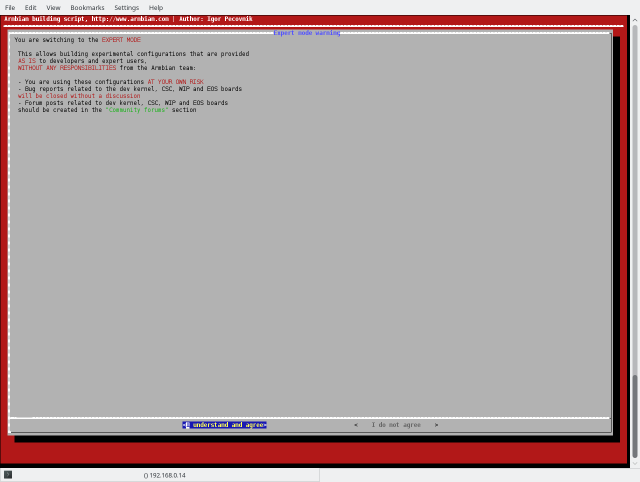
Go to <Show CSC/WIP/ESO>. Currently A20-SOM204 is not officially supported by Armbian team. Instead the board is supported by Olimex team, which is under CSC section. So select that menu and confirm the action.
Select olimex-som204-a20.
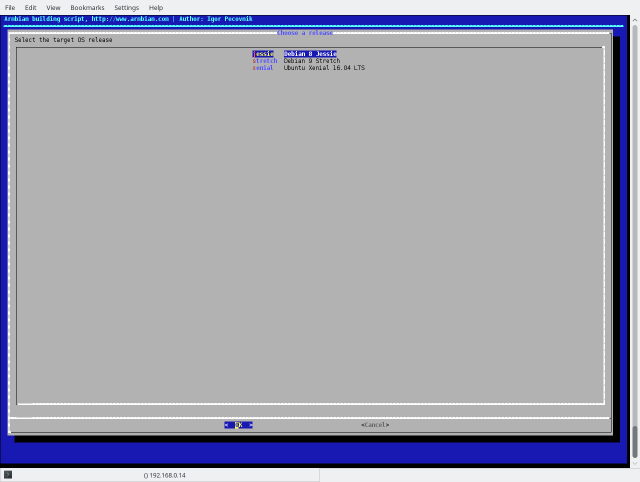
Select desired distribution. We recommend jessie for server build, and xenial for image with desktop environment.
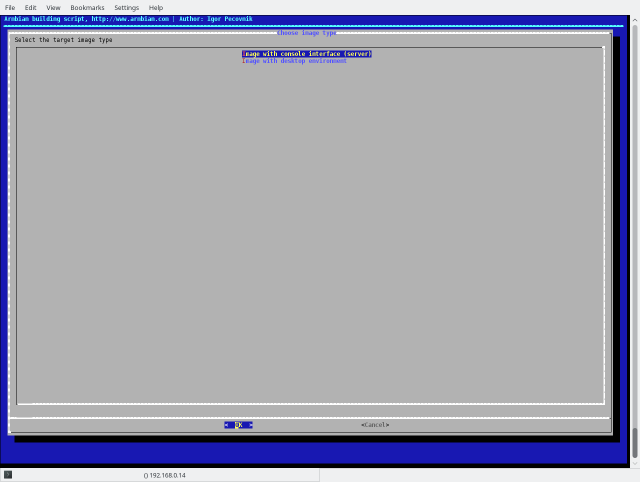
Select if you want server or desktop.
After build the images and other packages will be in the output folder:
 # tree output
 output/
 ├── config
 ├── debs
 │   ├── armbian-config_5.41_all.deb
 │   ├── armbian-firmware_5.41_all.deb
 │   ├── armbian-firmware-full_5.41_all.deb
 │   ├── armbian-tools-jessie_5.41_armhf.deb
 │   ├── armbian-tools-xenial_5.41_armhf.deb
 │   ├── extra
 │   ├── jessie
 │   ├── linux-u-boot-dev-olimex-som204-a20_5.41_armhf.deb
 │   └── xenial
 │       └── linux-xenial-root-dev-olimex-som204-a20_5.41_armhf.deb
 ├── debug
 │   ├── logs-09_02_2018-13_53_10.tgz
 │   ├── logs-09_02_2018-15_08_20.tgz
 │   ├── logs-12_02_2018-10_58_50.tgz
 │   ├── logs-12_02_2018-11_01_35.tgz
 │   ├── logs-12_02_2018-11_11_51.tgz
 │   ├── logs-.tgz
 │   ├── output.log
 │   ├── patching.log
 │   └── timestamp
 ├── images
 │   ├── Armbian_5.41_Olimex-som204-a20_Debian_jessie_dev_4.15.0.img
 │   └── Armbian_5.41_Olimex-som204-a20_Ubuntu_xenial_dev_4.15.0_desktop.img
 └── patch
- Flashing image
Put sdcard in the host PC. New device should appear, e.g. /dev/sdc. Flash the image using the following command:
# dd if=Armbian_5.41_Olimex-som204-a20_Debian_jessie_dev_4.15.0.img of=/dev/sdx bs=10M
Replace /dev/sdx with your device. You must use /dev/sdx, not /dev/sdx1!

