ICE40HX1K-EVB
Contents
Documents
Hardware
GitHub repository with the hardware files
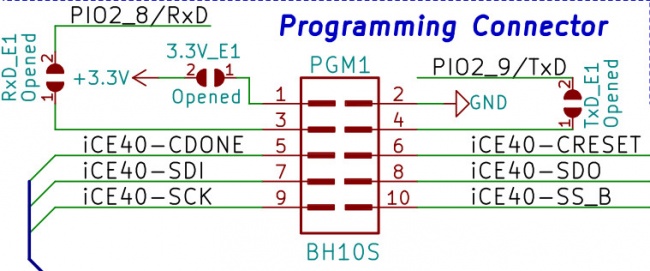
iCE40HX1K-EVB programming connector
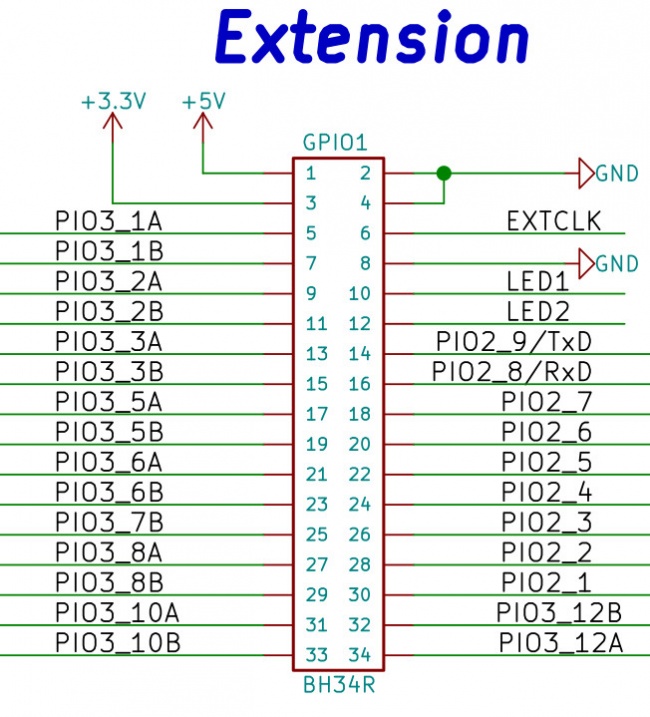
iCE40HX1K-EVB 34-pin bus connector
Software
Get started under Linux
To develop with iCE40HX1K-EVB you need:
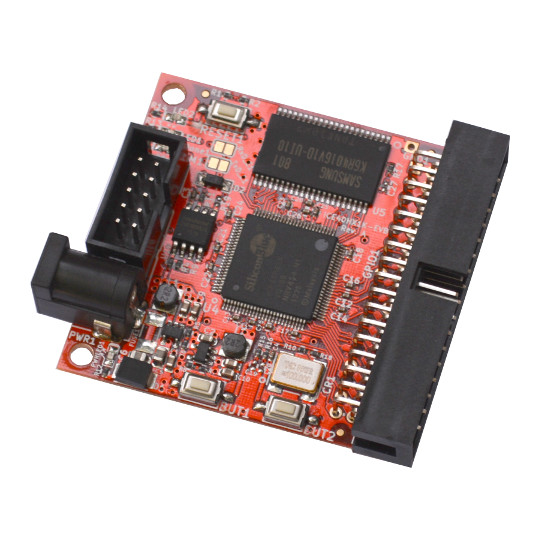
   iCE40HX1K-EVB
   OLIMEXINO-32U4 as programmer (or any other Arduino compatible board)
   IDC10-15cm cable to connect iCE40HX1K-EVB with OLIMEXINO-32U4
   SY0605E 5V power supply adapter
   USB-MINI cable
   optional but recommended USB-ISO
Installing Icestorm FOSS tools for iCE40
First we need to install the tools necessary to build Icestorm:
   sudo apt-get install build-essential clang bison flex libreadline-dev \
                    gawk tcl-dev libffi-dev git mercurial graphviz   \
                    xdot pkg-config python python3 libftdi-dev
Installing the IceStorm Tools (icepack, icebox, iceprog, icetime, chip databases):
   git clone https://github.com/cliffordwolf/icestorm.git icestorm
   cd icestorm
   make -j$(nproc)
   sudo make install
Installing Arachne-PNR (the place&route tool):
   git clone https://github.com/cseed/arachne-pnr.git arachne-pnr
   cd arachne-pnr
   make -j$(nproc)
   sudo make install
Installing Yosys (Verilog synthesis):
   git clone https://github.com/cliffordwolf/yosys.git yosys
   cd yosys
   make -j$(nproc)
   sudo make install
The Arachne-PNR build converts the IceStorm text chip databases into the arachne-pnr binary chip databases. Always rebuild Arachne-PNR after updating your IceStorm installation.
Notes for Archlinux: just install icestorm-git, arachne-pnr-git and yosys-git from the Arch User Repository (no need to follow the install instructions above).
Preparing OLIMEXINO-32U4 as programmer
Download latest Arduino IDE we recommend you to use the one from Arduino.cc current revision is 1.6.9.
Copy iceprog.ino sketch from GitHub/iCE40HX1K-EVB/programmer/olimexino-32u4 firmware to examples folder.
Plug the USB cable to OLIMEXINO-32U4 and start the Arduino IDE
   cd arduino-1.6.9
   sudo ./arduino
From Tools select 'Arduino Leonardo' as board.
From same menu select the PORT where the board is attached it will be something like: '/dev/ttyACM0 (Arduino Leonardo)' or '/dev/ttyUSB0 (Arduino Leonardo)'
Open the iceprog.ino sketch
From menu Sketch - > Include Library -> Manage Libraries check if you have SPI and SPIFlash libraries installed if not install them. You need to use version 2.2.0.
Compile and Upload the sketch.
If everything completes without errors now you have your OLIMEXINO-32U4 set as iCE40HX1K-EVB programmer!
Hardware connection between OLIMEXINO-32U4 and iCE40HX1K-EVB
It is a pretty straight-forward - use a 10-pin UEXT compatible cable between the two boards (like CABLE-IDC10-15cm). However, also make sure that the switching button of OLIMEXINO-32U4 is set to position 3.3V!
The signals at the PGM1 connector of iCE40HX1K-EVB are at 3.3V DC! If you use a 5V-only board instead of OLIMEXINO-32U4 you need to drive all SPI signals to 3.3V DC externally. Else there might be a short-circuit or the connection would be unsuccessful.
Add iceprogduino to IceStorm
Copy iceprogduino folder from GitHub programmer to icestorm and build it
   cd icestorm/iceprogduino
   make clean
   make
   make install
Make LED blink with IceStorm
Copy from GitHub ice40hx1k-evb to icestorm/examples then
   cd icestorm/examples/ice40hx1k-evb
   make
   make prog
LED1 and LED2 should start blink which means the code is successfully loaded
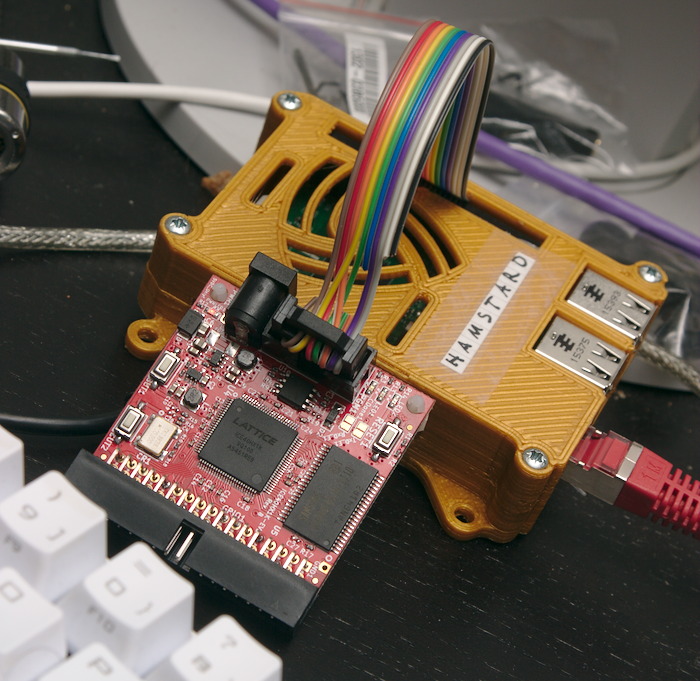
Iceprog with Raspberry PI
This section is contributed by Andreas Seltenreich

If you have a raspberry PI around, you can use the flashrom utility with Linux' /dev/spidev to program a bitstream to your ICE40HX1K-EVB.
The following table shows the wiring required for the Pi B+ or 2.
   |    | Raspi 2/B+ |        | ICE40-EVB |            |
   |----+------------+--------+-----------+------------|
   |  1 |         17 | 3v3    |         1 | 3v3        |
   |  2 |         18 | gpio24 |         6 | creset     |
   |  3 |         19 | mosi   |         8 | sdo        |
   |  4 |         20 | gnd    |         2 | gnd        |
   |  5 |         21 | miso   |         7 | sdi        |
   |  6 |         22 | gpio25 |         5 | cdone      |
   |  7 |         23 | clk    |         9 | sck        |
   |  8 |         24 | ce0    |        10 | #cd = ss_b |
   |  9 |         25 | gnd    |           |            |
   | 10 |         26 | ce1    |           |            |
build and install flashrom
   git clone https://github.com/stefanct/flashrom.git
   cd flashrom
   make CONFIG_ENABLE_LIBPCI_PROGRAMMERS=no CONFIG_ENABLE_LIBUSB0_PROGRAMMERS=no
   CONFIG_ENABLE_LIBUSB1_PROGRAMMERS=no install
enable SPI device on the Pi (needs reboot)
echo dtparam=spi=on >> /boot/config.txt
claim GPIO24 for sysfs-control
echo 24 > /sys/class/gpio/export
Pull GPIO24 low to put the ice40 into reset The cdone-LED on the board should turn off
echo out > /sys/class/gpio/gpio24/direction
Read the flash chip at 20MHz
flashrom -p linux_spi:dev=/dev/spidev0.0,spispeed=20000 -r dump
Write a bitstream
flashrom -p linux_spi:dev=/dev/spidev0.0,spispeed=20000 -w bitstream
Deassert creset
echo in > /sys/class/gpio/gpio24/direction
Get started under Windows
Projects
Under construction
FAQ
Under construction


