ArmbianHowTo
Contents
Building image
There is great Armbian documentation here.
- Clone repository
 # git clone https://github.com/armbian/build.git
 Cloning into 'build'...
 remote: Counting objects: 32391, done.
 remote: Compressing objects: 100% (69/69), done.
 remote: Total 32391 (delta 60), reused 75 (delta 44), pack-reused 32278
 Receiving objects: 100% (32391/32391), 258.91 MiB | 959.00 KiB/s, done.
 Resolving deltas: 100% (21325/21325), done.
 Checking connectivity... done.
 Checking out files: 100% (2205/2205), done.
Soon (probably) there will be olimex fork with some customizations.
- Run builder
 # cd build
 # ./compile
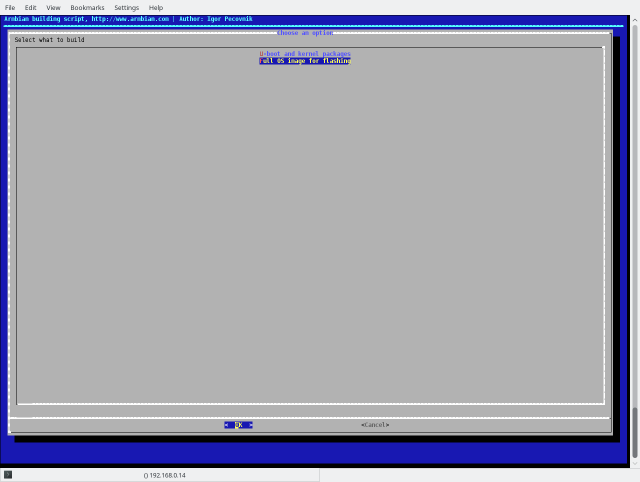
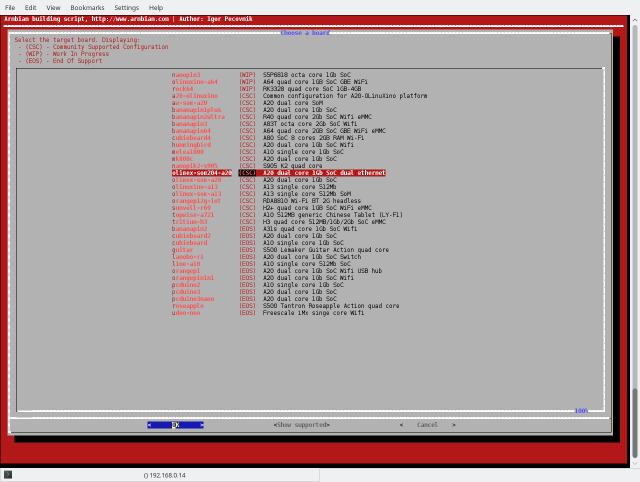
Building requires root access. System preparation can take long, depending on system, etc. After that you should see something like that:
Select Full OS Image for flashing. This will create output image for direct flashing on SD-card.
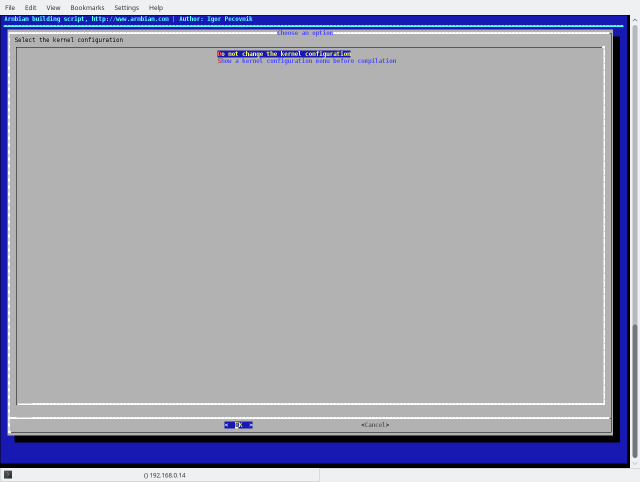
Select Do not change the kernel configuration. All needed configuration should be selected automatically. If you want some kernel modifications, select the other option.
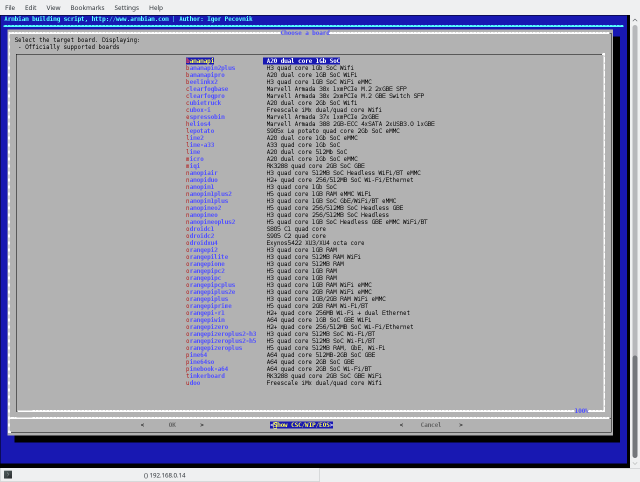
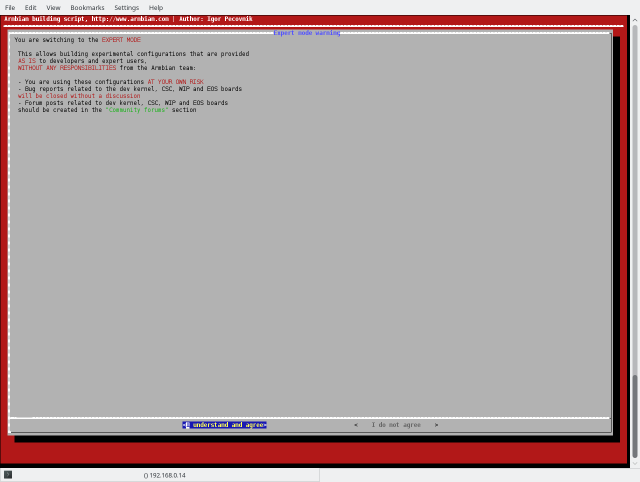
Go to <Show CSC/WIP/ESO>. Currently A20-SOM204 is not officially supported by Armbian team. Instead the board is supported by Olimex team, which is under CSC section. So select that menu and confirm the action.
Select olimex-som204-a20.
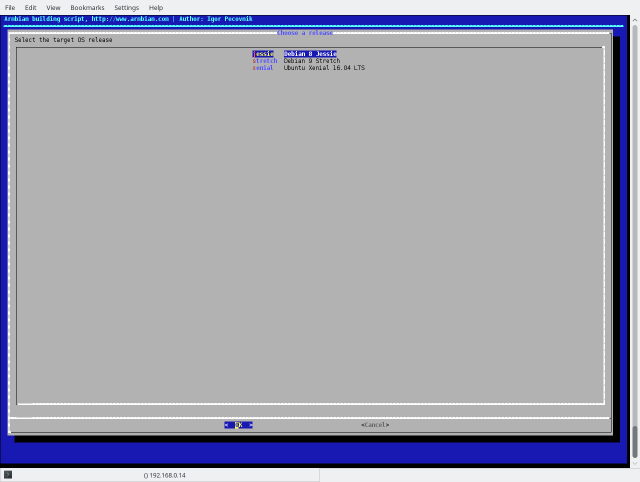
Select desired distribution. We recommend jessie for server build, and xenial for image with desktop environment.
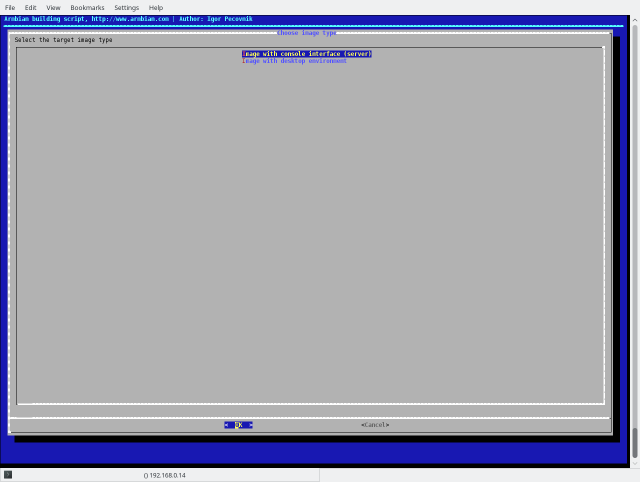
Select if you want server or desktop.
After build the images and other packages will be in the output folder:
 # tree output
 output/
 ├── config
 ├── debs
 │   ├── armbian-config_5.41_all.deb
 │   ├── armbian-firmware_5.41_all.deb
 │   ├── armbian-firmware-full_5.41_all.deb
 │   ├── armbian-tools-jessie_5.41_armhf.deb
 │   ├── armbian-tools-xenial_5.41_armhf.deb
 │   ├── extra
 │   ├── jessie
 │   ├── linux-u-boot-dev-olimex-som204-a20_5.41_armhf.deb
 │   └── xenial
 │       └── linux-xenial-root-dev-olimex-som204-a20_5.41_armhf.deb
 ├── debug
 │   ├── logs-09_02_2018-13_53_10.tgz
 │   ├── logs-09_02_2018-15_08_20.tgz
 │   ├── logs-12_02_2018-10_58_50.tgz
 │   ├── logs-12_02_2018-11_01_35.tgz
 │   ├── logs-12_02_2018-11_11_51.tgz
 │   ├── logs-.tgz
 │   ├── output.log
 │   ├── patching.log
 │   └── timestamp
 ├── images
 │   ├── Armbian_5.41_Olimex-som204-a20_Debian_jessie_dev_4.15.0.img
 │   └── Armbian_5.41_Olimex-som204-a20_Ubuntu_xenial_dev_4.15.0_desktop.img
 └── patch
- Flashing image
Put sdcard in the host PC. New device should appear, e.g. /dev/sdc. Flash the image using the following command:
# dd if=Armbian_5.41_Olimex-som204-a20_Debian_jessie_dev_4.15.0.img of=/dev/sdx bs=10M
Replace /dev/sdx with your device. You must use /dev/sdx, not /dev/sdx1!
Changing display output
With current kernel version (4.13) changing display output must be done by recompiling u-boot. This is necessary because kernel supports only SimpleFB. This will change in the future.
LCD
Enable touchscreen
Create blacklist file:
# echo "blacklist sun4i_gpadc_iio" > /etc/modprobe.d/blacklist-touchscreen.conf
# echo "blacklist sun4i_gpadc" >> /etc/modprobe.d/blacklist-touchscreen.conf
Calibrate touchscreen
Install calibration package:
# apt-get install xinput-calibrator
After completion start the program inside the X.
Applications
  -> System
    -> Calibrate Touchscreen
You will see blank screen. Touch the display at the marks. Then store the calibration values. Create new file 99-calibration.conf
# cat > /etc/X11/xorg.conf.d/99-calibration.conf << __EOF__
Section "InputClass"
	Identifier	"calibration"
	MatchProduct	"1c25000.rtp"
	Option	"Calibration"	"3930 108 348 3948"
	Option	"SwapAxes"	"0"
EndSection
__EOF__
Put the values from the calibrator program.
VGA
Changing resolution
The default resolution in 1024x768. You can list all resolutions with:
# xrandr
The output should be something like this:
Screen 0: minimum 320 x 200, current 1280 x 1024, maximum 8192 x 8192
VGA-1 unknown connection 1280x1024+0+0 (normal left inverted right x axis y axis) 0mm x 0mm
  1024x768      60.00 +
  1920x1200     59.88    59.95
  1920x1080     60.00
  1600x1200     60.00
  1680x1050     59.95    59.88
  1400x1050     59.98    59.95
  1600x900      60.00
  1280x1024     60.02*
  1440x900      59.89    59.90
  1280x960      60.00
  1366x768      59.79    60.00
  1360x768      60.02
  1280x800      59.81    59.91
  1280x768      59.87    59.99
  1280x720      60.00
  800x600       60.32    56.25
  848x480       60.00
  640x480       59.94
To change resolution from the command line, do the following:
# export DISPLAY=:0
# xrandr -s <resolution>
HDMI
Set custom resolution
To use lower resolution than 1920x1080 append /boot/armbianEnv.txt with:
extraargs=video=HDMI-A-1:1280x1080
This will set monitor with 1280x1080 resolution. Getting supported modes is done with:
# cat /sys/class/drm/card0-HDMI-A-1/modes
1920x1080
1920x1080
1920x1080
1920x1080
1920x1080
1920x1080
1280x1024
1280x960
1152x864
1280x720
1280x720
1280x720
1024x768
1024x768
1024x768
832x624
800x600
800x600
800x600
800x600
720x576
720x480
720x480
640x480
640x480
640x480
640x480
720x400
Disabling HDMI output
To disable video output on the HDMI monitor add folloing in /boot/armbianEnv.txt:
extraargs=video=HDMI-A-1:d
Save the file and reboot the board.
Debugging
Enabling DRM debug output
The DRM driver supports multiple debugging levels.
Add the following in /boot/armbianEnv.txt:
extraargs=drm.debug=0xf

